Chairman of the Board
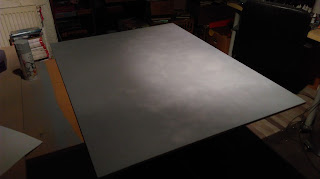
Over the Christmas holiday, I was able to start work on a new gaming table. Initially I wanted to make a Square Bashing specific board and realised that the two MDF boards I use to put my polystyrene boards on top of were the perfect size, being 4ft x 3ft each.
Being MDF the first thing to do was the prime the board. I actually painted both sides of the board to sop them warping but in the event I didn't need to do this, the 12mm thick board was strong enough not to shrink! I used some cheap primer spray from Wilco's that cost me about four quid a can. It took two cans to do both sides of the board.
The next stage was easy enough, paint the entire thing in Burnt Umber to give a base colour for the flock later. I was going to use a spray for this, but the ones I bought from EBay were a bit rubbish, so I used some acrylic and a brush.
Then the final stage was to flock the entire table. This was easily done with a load of PVA and some flock that I bought off EBay. I hand painted the PVA and scattered the flock over it. Next up, I tipped the board over some paper on the floor to catch the flock and banged the back of the board to get rid of the loose flock. The final stage was to paint watered down PVA over the bits I'd missed or had a thin amount of flock on. I then sprayed a fixer over the entire board to hold the flock.
You'll see the flock is not a perfect cover, but I like that, as real grass isn't perfect. My original plan was to then draw a 6" square grid over the entire board for Square Bashing, but I decided not to in the end and do the other board the same to make a nice big 6"x4" board.
I did the second bard exactly as I had with the first. So, now I will have to rethink my idea for a Square Bashing board. I may use the old polystyrene boards I have, then they won't be wasted.
Whilst I was busy with flock, I also made a few ploughed fields with some left over MDF boards I had. These were very simply done by pasting ridged wallpaper to the boards. This was then painted with Burnt Umber and heavily drybrushed with Khaki. Finally, the edges were flocked and hey presto: some fields!
In other news, Dean and I played Star Wars: Rebellion over the holidays, I was the Imperials, he the Rebels. We played for nearly four hours and only got onto the sixth move. But it was our first game ever, so we had to do everything step-by-step in the first couple of turns. Once we got used to it, thing sped up and it flowed pretty well.
My crowning achievement was moving the Death Star into orbit around Kashyyyk and blowing it away.
A big and expensive game (£70!), but well worth it for Star Wars nerds as it comes packed with masses of figures, spaceships, ground vehicles, counters and cards. I can't wait to play another game of it!
Thanks for reading!


You appear to have made a very neat job of the boards. Congratulations. I can imagine all too well the bloody awful mess that I would have made of it. I attempt a degree of secrecy and subterfuge regarding toy town / rural design and construction. Fails every time. Flock is such a give away, evidence for the prosecution. Guilty as sin. Flock is attracted to dog fur and resists all attempts to remove it. Great stuff.
ReplyDeleteThanks Chris, but you haven't seen them close up... Have you tried using a sealant on the flock? I had some for sealing charcoal to paper from an art suppliers and it has worked really, really well!
Delete