Trench Hammer: A Solo AAR and Review
I recently saw a review of Trench Hammer in a Facebook group I am member of. It is a set of rules by Nordic Weasel Games and are designed for gaming small unit actions in the First World War. I bought my PDF copy at The Wargames Vault and they cost me a measly $4.99. Trench Hammer was, I believe, released in 2017 and it looks like a Second Edition has already been created on the NWG website, called Trench Storm (?), but I can't seem to find a link to buy it at the moment (update this is a different game altogether!). The small unit aspect of the game appealed to me given my interest in the development of platoon tactics in the First World War. Having downloaded the game, I tried it out as a solo game and here is an AAR along with a review of the game.
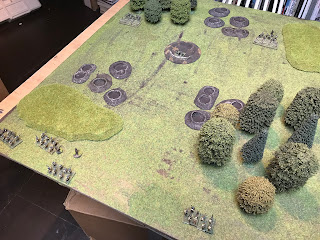
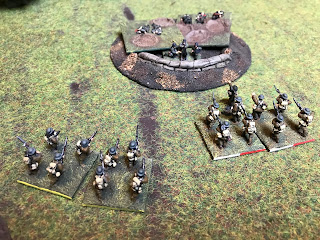
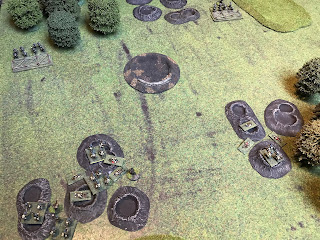
I set up the game as below, with a British platoon of a rifle section, bomber section, Lewis Gun section and rifle grenade section commander by a platoon leader. They were attacking a German HMG dug in to a shell crater in the centre of the table, supported by two rifle sections in hastily dug trenches and a platoon commander. This was a typical attack on strong-point during the last 100 days of the war in 1918 and is the first scenario in the rules. The game is played on a 2' by 2' table, so you don't need large amount of room.
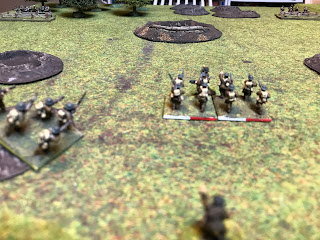
Trench Hammer is an IGOUGO game, with each side rolling 2D6 for their command points. Experienced troops (such as the British here) choose the higher of the dice, inexperienced troops (such as the German class of '18 here) use the lowest of the two scores. This number is how many units can be ordered in your turn. Units can be ordered to Engage (move and fire), Regroup (recover casualties), Withdraw (falling back whilst recovering casualties) or Redeploy (move fast). The British rolled high and were able to command all of their units. In the first turn, following the examples laid down in SS143: Instructions for Training of Platoons in Offensive Actions 1917 (my favourite training pamphlet of the First World War) the units all redeployed to get into position as quickly as possible. The LMG moved to the right flank to cover, the rifle grenadiers went to the left to get ready to add mobile artillery to the attack and the rifles and bombers moved forward!
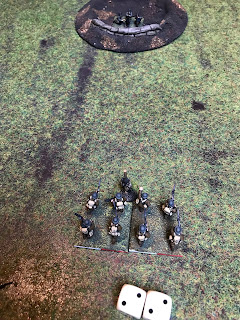
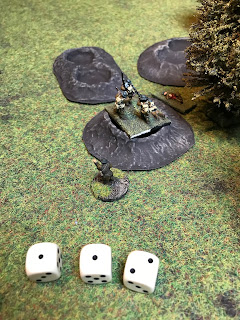
As all the British units redeployed it meant that they couldn't fire, so the Germans took their turn, rolling a 2 for their command. This meant that the HMG could fire. Units can only fire at one other single unit. To fire you take a base number to hit, 7+, add or subtract modifiers for various factors, such as cover etc and roll 2D6 aiming to roll over that score to hit. The minimum a 'to hit' score can be is 5+, and with the British bombing party moving in the open this is what the German HMG needed. Unfortunately, their must have been a stoppage as they only managed a 4!
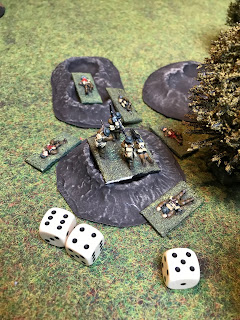
On the right flank the British LMG crew were not so lucky! German rifle fire scored 10 against the 9 needed (the shell holes were providing cover) and caused 5 casualties! When you hit, you roll 1D6 for casualties on the target (there are some modifiers depending on the weapon). Units can take 7 damage before being destroyed but other numbers disallow certain actions and can affect the amount of damage a unit can deal out, so 5 was pretty serious.
With the German firing complete, it was the British turn and again they were able to command all their units. First things first though, I sent the commander to the LMG team. Leaders don't need to be moved with command points and have abilities that can help units move, fire or recover. In this case, I used the platoon leader to reduce the LMG team's casualties by 1. The LMG team elected to regroup to try to recover further. This is simply done by rolling 3D6, one at a time. If you score equal to or under the number of casualties that the unit has, you can remove one. In this case the LMG team rolled a 1, another 1 and a 2, which mean they could recover 3 of their casualties! They were now back down to 1 casualty, but were unable to do anything else this turn.
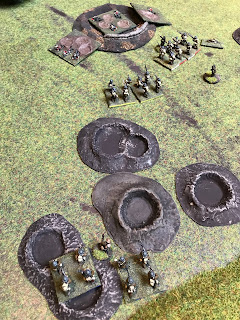
Meanwhile, the British bomber section began assaulting the HMG position. Bombs are good for getting units out of dug in positions as they ignore to hit modifiers for trenches! They were close enough to the machine gun nest to use the assault factors (basically an attack under 6"). They hit their targets and caused three casualties on the MG.
Then the British rifle section opened fire and also caused more casualties, close but not enough to wipe out the gun team.
In an assault (any attack under 6"), the enemy gets the chance to return fire simultaneously. The HMG did, but caused no casualties on the British rifle section, but dealt out two damage to the bombers.
But the British had one more unit that had not yet fired, the rifle grenades. Like the bombs these also ignore trench defence bonuses, but cause 1D6-1 damage. They are unable to fire under 6" from a target, so they were perfectly located to drop grenades on the HMG. They hit and gave out 2 more damage, which was enough to destroy the HMG.
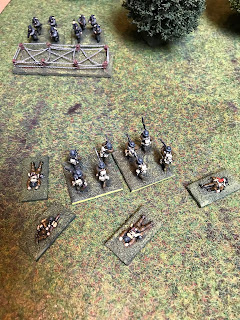
Victims of hubris the British bombers decided to attack the remaining Germans but were cut down as they assaulted their new target!
Similarly, on the left flank the rifle section also came under fire and lost 4 damage in the efforts to attack.
Feeling that discretion is the better part of valour, the British rifles withdrew back to the safety of the shell craters and I elected to end the game there.
Arguably, this was a British victory as they had destroyed their primary target, the HMG. Unfortunately, an unsupported attack on a trench line was only going to have the inevitable results and the bombers paid the price highly. Using the tactics of the time (see SS143...) and using the LMG and rifle grenadiers as support on an attack on a strong-point worked very well and the rules reflected this.
It was an enjoyable game and with a stripped down ruleset meant that it flowed pretty quickly as well. There are advanced rules for things like tanks, artillery and infiltration within the 34 page rulebook. Added to this are some basic campaign rules, optional rules and an examination of platoon organisations of the Germans and British to get you started. Using your already based figures isn't a problem and the rules are very free and easy with how you use your little men. Even if you haven't got any First World War figures, you could easily play a game of Trench Hammer with a couple of boxes of plastic First World War figures for a reasonably small lay out, including the low price of the rules.
Update: having been in conversation with Jozi Patrick about Trench Hammer, he guided me to his Quick Reference Sheet for the game, along with printable unit cards to make playing easier. Find his resources by clicking HERE. also, have a look at his BLOG, where there are plenty of Trench Hammer scenarios and ideas.
Update: having been in conversation with Jozi Patrick about Trench Hammer, he guided me to his Quick Reference Sheet for the game, along with printable unit cards to make playing easier. Find his resources by clicking HERE. also, have a look at his BLOG, where there are plenty of Trench Hammer scenarios and ideas.





Thanks for the write up and review. I've had these on my radar for a while, so may well take the plunge!
ReplyDeleteNo problem, I'm glad you liked it. It's well worth it's measly price tag!
ReplyDeleteYou should look at Jozi'sTin Man blog - http://jozistinman.blogspot.com/
ReplyDeleteHe helped write the rules and has a bunch of AARs
Cheers, I have actually Jozi's blog, he has some great info on there!
DeleteI am a big fan of Squad Hammer in it's sci fi incarnation. It has so many options you can basically create the game you want. I am using it to play land battles with old WOTC Star Wars figures.. I would highly recommend the options pack. New spotting rules which are much better. Most importantly though it moves to 13 damage to destroy a unit. Most weapons doing double the damage they used to. The bell curve on 2D6 evens out the luck element of damage rolls a little.
ReplyDeleteCheers Tim, I will check out the options pack. It sounds good. I think the only issue I have is the very random damage aspect, so a bell curve result would be more realistic.
DeleteGlad folks are enjoying this. Your figures and terrain look great, as always.
ReplyDeleteThanks for the comment Jozi! Very much appreciated!
Delete