A Ruined Church
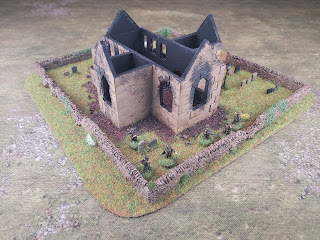
Back when I was a poor wargamer and couldn't afford to buy manufactured products, I had to make my own and I built a few buildings, including a ruined church. I used it in a game recently and realised that I really should spruce it up a bit. So I did and this is it.
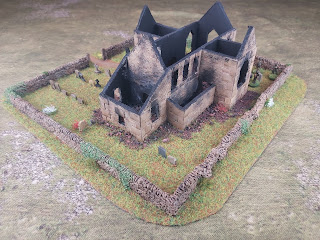
I clad it in embossed plasticard, to look like a stone built building. I added details such as the corner edging and window details.
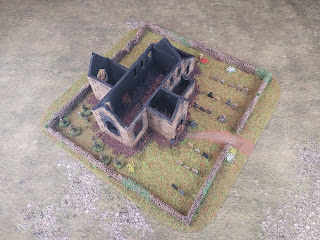
I also mounted it on a vinyl tile as a church yard, added gravestones and a dry stone wall which I found on Ebay. The grass is static grass and the foliage on the walls is some leaf like scatter that I have. I like the way that this breaks up the wall shapes in particular.
Further details were added in the form of grass tufts, flowers and a lamp from Sabotag3d. I also put some rubble around the building. I was going to add more collapse details on the interior, but I wanted to be able to move figures about inside.
I was pretty pleased with how it turned out, it did take a while to get it finally finished and I stumbled along the way but I am glad that I kept at it. And if you're wondering what it looked like before I got to work on it, well, here it is:
Also, on the Storm of Steel Yotube channel, I have released part two of the How to Play Chain of Command videos, and a look at my German Stalingrad forces for Rapid Fire/IABSM. Have a look at both them here:


That is a really excellent transformation. The original is nicely planned out, but the upgrade obviously takes it to another level. The burn charring is spot on. I am in a bit of a building / basing drive at the moment, so enjoyed this.
ReplyDeleteCheers Norm, I was on the verge of throwing the original away, so I am glad I didn't!
DeleteExcellent work on the scratch build and even beter work on the upgrade!
ReplyDeleteThanks Greg, I think the original was OK for a twenty year old model, but I am much happier with the upgrade!
DeleteThat looks great. The before and after pictures shows how a bit of fettling and a good base can really lift a model.
ReplyDeleteCheers,
Pete.
Cheers Pete, it took a while to upgrade, but it wasn't a particularly difficult build and I agree that the base really adds a punch to the overall effect.
DeleteTruly superb!!
ReplyDeleteThank you Phil, very much appreciated!
DeleteYou are a good blogger, you have good command on topic like this,I want more from you,I have also some Useful Links to share.
ReplyDeleteAgen Sbobet Terpercaya