Mont-St-Who? A Blücher AAR
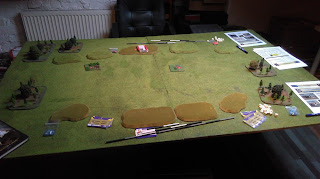
What with finishing off II Corps of the French army for the Waterloo campaign over Christmas (I'll be posting pictures of the last handful of brigades in the next few posts), I wanted to try them out in battle. So, I invited Dean over last Saturday for a game of Blücher, which also utilised my new gaming table! I quickly set up some scenery, for a board that has a look of Waterloo about it, with two farmhouses dominating the centre of a long valley.
The French had two full corps (about 230 points), against Britain's I Corps and a contingent of Brunswickers (about 160 points). I took the latter and positioned them on a ridge overlooking the farm houses. The French were positioned on the other side of the valley, threateningly. The two farms were objectives, as was one of the hills on the British held ridge. To win the game one of us had to hold at least two of these objectives after thirty turns.
This would be a race to the farms and the French began by plunging II Corps forwards, as steady as a steam roller. Meanwhile, I despatched the two Guards brigades (my best units) to each farm, hoping to get into position as soon as possible against the advancing troops.
The farm on my right was occupied with no problems and the soldiers began making defences in the building.
Just in the nick of time my soldiers were able to get into the left farm, just before elements of French II Corps captured it. Meanwhile on my extreme left flank I unveiled the Brunswickers, just in case the French got too close.
Despite having my best soldiers in the farm and my artillery peppering the French infantry as they advanced, they attacked in a mass against the defended position.
The results were catastrophic for me! His attack inflicted seven hits which broke the Guards instantly. French infantry rushed in to the position to claim an objective!
This immediately made my left flank look quite shaky, so I started to draw in Dutch troops to defend the ridge. Hunkering down they awaited the French onslaught.
With the farm secured, the French infantry began fanning out to launch their attack on my positions.
However, not everything was going his way, a French brigade crashed into my Brunswickers, who stood their ground and sent the Frenchmen flying back.
Musket fire was exchanged at the front of the ridge, to no one's particular advantage. I was waiting to unleash my cavalry and hoping that I could reduce his Elan enough to try and pick off a few brigades. My artillery had retired from the field after blasting through its ammunition, so there was also a hole in my defences.
The time was right for a cavalry charge, or so I thought. I threw the Brunswick horse at an exposed flank of one of his brigades. However, the French were still strong enough to send my cavalry back whence they came!
With things turning into a desultory shooting match in front of the ridge, the French I Corps sprang into life and began the long march across the fields.
The Dutch and German troops on my left were holding their own despite taking a hammering. A cavalry charge from the Dutch and, again, the Brunswicks, soon sent Frenchmen scattering!
All the while I Corps were getting nearer with their fresh troops. A French cavalry division attacked my Dutch cavalry and sent them routing off the field, in turn trapping themselves behind the British line.
Taking care to avoid the occupied farmhouse on the right, I Corps advanced slowly and menaced the gap on the ridge where the KGL and more Dutch troops stood.
His intention was clear, to use the force of the Corps to smash their way onto the hill! I was sure things were not going to go my way. At this stage I had barely an untouched unit, all were suffering from some form of damage and fatigue. The KGL had taken such a battering that they were forced to begin to withdraw.
It was time to start using the few fresh units that I had left, so I began gathering them on the ridge with the objective marker, to try to make some last stand.
My Cavalry attacks proved fruitless and they ended up back on their start lines, more fatigues than before! I was running out of options and there were still French cavalry threatening my rear lines.
However, things took a bit of a bright turn after an Allied unit was pushed off the ridge by a French infantry attack and found themselves directly facing the lurking French cavalry.
The French cavalry were quickly dispatched with musket fire and his assaults seemed to be faltering as we entered the last turn of the game. With the British and Allied soldiers still holding on to the ridge and a farm, I was declared the winner!
The hammer blow from I Corps had failed, largely because he didn't begin advancing them in time. Had they started their attack maybe two turns earlier, they may have had a massive influence on the outcome. As it was, they were held back just a smidgen too long, which gave me breathing space.
Blücher rewards boldness and the nerve to advance under fire, it is also attritional, so that you have to wear down your opposition and strike the killer blow at precisely the right time. The French Corps on the right wore down their opponents and looked at times at though they would achieve a massive blow on my defences, but the support came too slow and too late. The Thin Red Line held for long enough to see the day through. Another great game of Blücher!
Thanks for reading!


Nice to see the 6mm getting into action.
ReplyDeleteThanks Norm, they certainly look impressive when they're all on the table!
Delete