Command And Colors Napoleonics: a Review
Ever fancying taking the role of the Corsican Ogre or seeing
if you can do better than Britain’s most famous boot wearer? Well, now you can
with Command and Colors Napoleonics, the battlefield game by GMT Games.

Command and Colors is series of games designed by Richard
Borg which began with Battle Cry (ACW) and Memoir ’44, a World War Two tactical battlefield game.
This was followed by Command and Colors Ancients and other games in the series
cover the First World War, American War of Independence
and soon Samurai battles and Science Fiction games. This review is going to look in depth at Command andColors Napoleonics, first produced in 2010 and now on its third printing. This post looks at the core box and the contents, along with an introduction
to some of the rules of play and how the system works. There is a video to accompany this review which looks at the rules with some examples of play and you can watch here (please pop over to Youtube and subscribe to Storm of Steel over there for future gaming and military history videos!):
So without further ado, let’s look inside! The first thing
you notice is that this is a weighty box and its crammed to the top with game!
We have two sets of booklets, the first is the rules booklet which has 24 full
colour pages covering everything you need to play. The second booklet is the
scenarios and here we have 16 pages covering 15 different scenarios. As the
core box covers the British and French, along with the Portuguese, it should
come as no surprise that the scenarios covered are heavily weighted towards the
Peninsular war of 1807-1814, but it also includes two scenarios of the 1815 100
Days Campaign, the Battle of Quatre-Bras and the afternoon of Waterloo, before
the Prussian arrival. Each of the scenarios are given clear maps and starting
points for each player’s forces, including all the other information you’ll
need to play.

To help this, there are several play aid sheets, printed on
stiff card and in full colour. These sheets cover the rules for terrain
features, the tactical card types and the units in each player’s army. Each
army has slight differences from the number of pieces in a unit to the combat
effects and all of these are laid out clearly here.

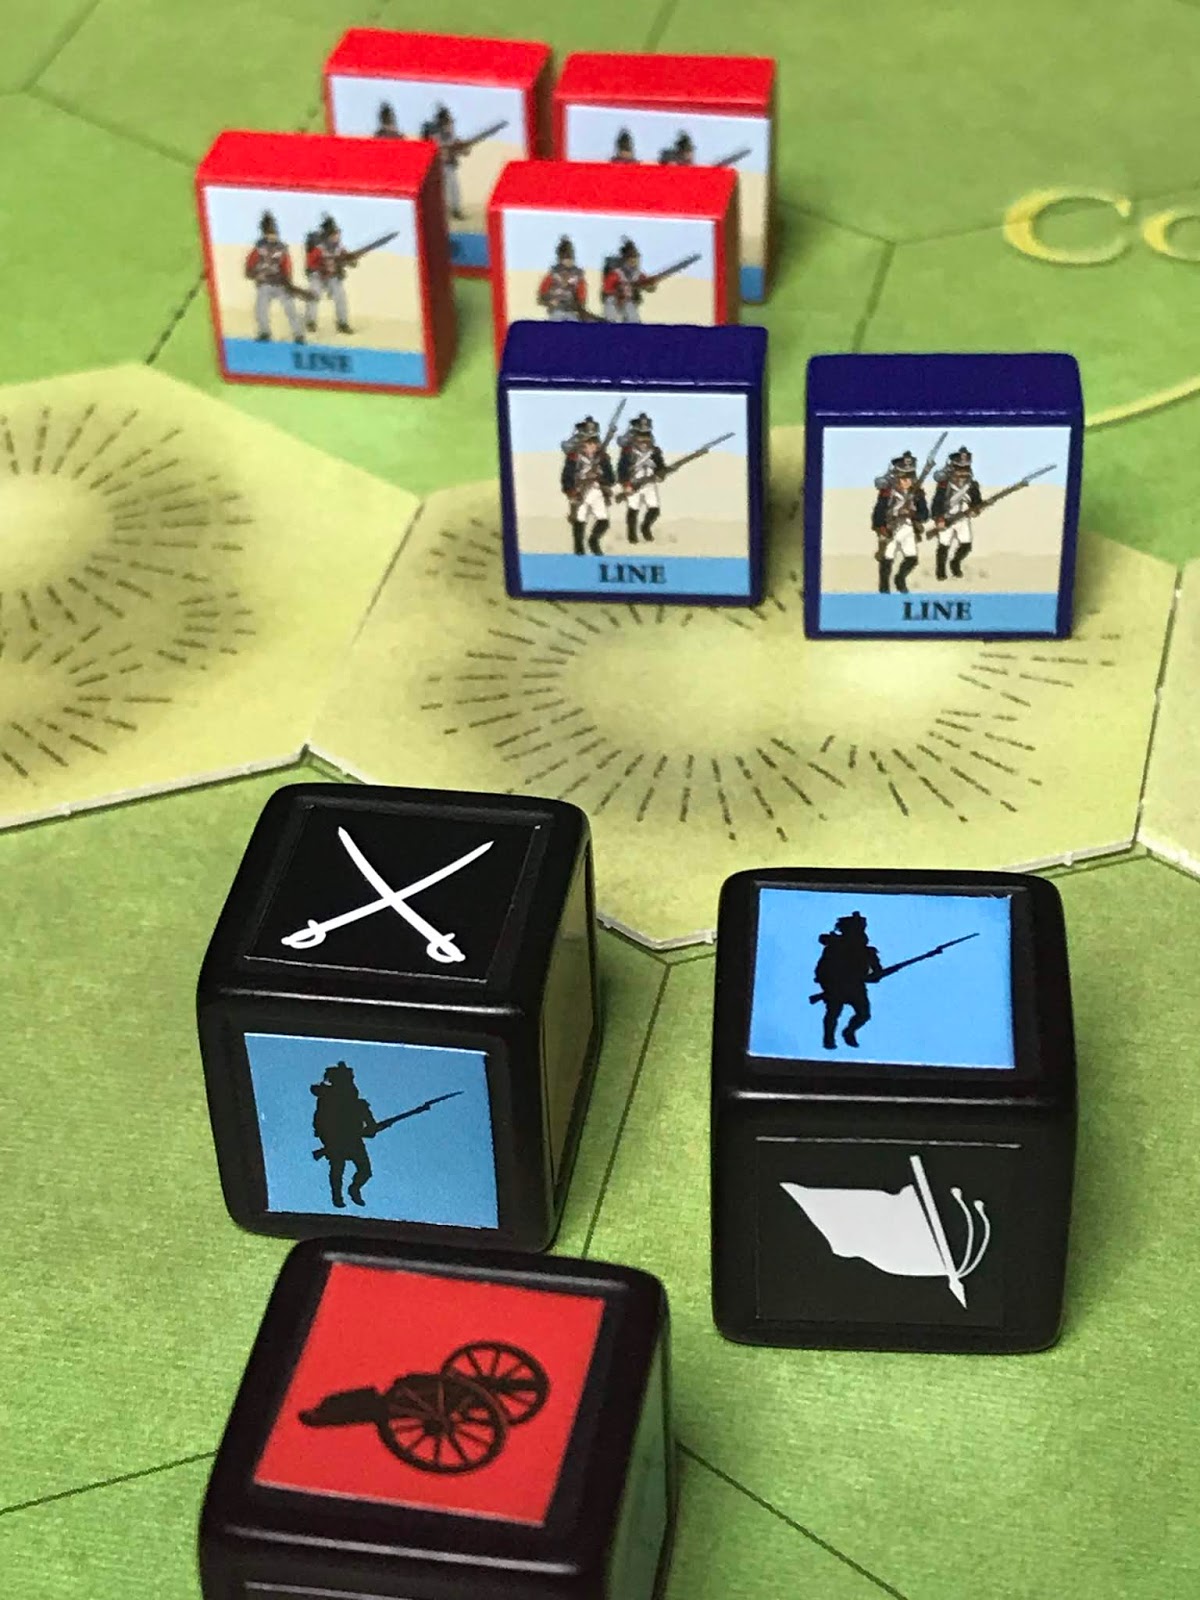
Next up there are the battle dice, eight in total. The
symbols on the dice are stickers which are also provided and have to be applied
before starting your first game. There are also the victory banner counters
here to help you keep track of how well, or not, you are doing in the game. Each
scenario has a certain amount of banners to collect by destroying enemy units,
capturing features and various other means to ensure victory. Also included in
the tokens are the square tokens, but we will look at these in detail a bit
later on.


And where would a commander be without his command? In
Command and Colors, activating your force is done by playing various command
cards. Each card tells you how many of your units you can activate and where on
the battlefield this can happen. In each turn you will not be able to activate
every unit you like and this simulates the fog of war and friction found on any
battlefield. Playing these cards correctly is the key to victory!

And to fight a battle, a commander needs a battlefield. This
is provided by the hex marked map board and populated with the hexagonal
terrain pieces. These are double sided and cover all kinds of terrain from
villages, to hills, to rivers, to sandpits, to woods and more. Each of these
types of terrain has an impact on troops moving through it, or fighting in it.

And finally, we have the square track cards, these are used
in the game to track which of your infantry units have formed square against
cavalry attacks. We will come back to this part of the game later.

Each player will take one of the opposing armies in Commandand Colors and these are provided by coloured wooden blocks each with a sticker
placed on to show what kind of unit they are. There’s 340 of these blocks
coloured in blue for the French, red for the British and brown for the
Portuguese. Here is the French!

And the British!

And the Portuguese!

Each of the stickers has a well designed and colourful representation of the unit they belong to, from line infantry, to militia, to heavy cavalry and artillery, everything you need to play is included. The stickers have to be placed on by hand and be warned, this will take some time. I spent about three hours at the task, but it was worth it in the end.
That covers the box contents, so the next question is, how
does it play? For an example of play I have set up the board as the first
scenario in the list, the Battle of Rolica 17th August 1808. Led by
Sir Arthur Wellesley (the future Duke of Wellington) the mixed British and
Portuguese force of 15,000 men advanced against a French force of 5,000 men
commanded by General Henri Delaborde. The French planned a delaying action to
await reinforcement and stood on the hills surrounding Rolica. They were
blocking the British advance on Lisbon.

Each of the units under your command are made up of a number
of blocks, the British line infantry, for example, have four blocks per unit,
the British light infantry are made up of five blocks and artillery is three
blocks. These numbers give you the strength of the unit and their ability to
fight. When the final block is removed from a unit from casualties it is
considered destroyed and the opponent gains a victory banner token.


Each player takes a turn and who ever is the active player
plays a command card from their hand. In this example the British player has
six cards, as dictated by the scenario.

Each card shows how many units can be activated in that turn and in which portion of the battlefield, flanks or centre. These are clearly marked on the board by a dashed line so you know exactly what is allowed. The British player chooses the ‘Coordinated Advance’ card, which allows a unit on both the left and right flank to activate along with two in the centre. In order to move or fight a unit must be activated, so it is crucial that careful thought is given to the card played and the units that are chosen.


Each card shows how many units can be activated in that turn and in which portion of the battlefield, flanks or centre. These are clearly marked on the board by a dashed line so you know exactly what is allowed. The British player chooses the ‘Coordinated Advance’ card, which allows a unit on both the left and right flank to activate along with two in the centre. In order to move or fight a unit must be activated, so it is crucial that careful thought is given to the card played and the units that are chosen.

Movement is simple, most Line units and foot artillery will
advance at the rate of one hex per activation, some light units and horse
artillery can move up to two hexes and most cavalry can move up to three hexes.
Here the British commander activates the Portuguese line to advance down from
their hill top on the right flank.

Then they activate two British line units in the centre. One of these units has advanced into the woods, these means if they had another hex of movement they would have to stop here, but as they only have one they end here anyway. However, the woods provide cover and reduce the amount of attack dice thrown, so this is a good position to be in.

And finally on the left flank another British line infantry unit moves forward. In this scenario, the river is fordable, so crossing it is no problem. These four units are the only ones that can be activated by the card played by the British player and as none of these units are in range of an enemy it ends the British player’s turn. They now draw a new command card and play turns to the French player.

So far, so simple. The next thing we look at is the
fighting. There are two forms of combat in Command and Colors; ranged and
melee. Ranged combat occurs when a unit is one or more hexes away from an
enemy unit it wants to engage, melee combat occurs when the units are adjacent.
Only infantry and artillery can conduct ranged combat. Infantry fire at two
hexes, unless they are light rifles, then they have a range of three hexes.

Foot artillery will fire at a maximum range of 5 hexes and horse artillery will fire at 4 hexes maximum. In both cases, this is reduced if the artillery unit has suffered casualties.

Foot artillery will fire at a maximum range of 5 hexes and horse artillery will fire at 4 hexes maximum. In both cases, this is reduced if the artillery unit has suffered casualties.

A melee combat occurs when an activated unit is adjacent to
an opponent’s unit. This represents the bayonet charge.


In both cases, combat is decided by rolling the battle dice.
The number of dice rolled is determined by the type of unit, the amount of
blocks the unit has remaining, the terrain modifiers for both attacker and
defender and other additions and subtractions. Here the British line unit has
moved forward and then fired on the French Light unit on the hill.

A British Line infantry unit normally rolls one dice per block, but as they are firing uphill this reduces that number by one. British Line infantry roll an extra dice if they have not moved, but this unit has, so we arrive at three battle dice rolled. The British player has rolled an artillery symbol, an infantry symbol and a flag symbol. The symbol rolled indicates the opposing unit’s losses, so the artillery symbol is not counted, but the infantry symbol is. The French unit loses one block. The flag symbol indicates that the French unit must retreat one hex towards its own lines. More flags would mean more retreats. So, the French unit falls back to the only open hex off the hill away from the British unit and with a reduction of one block. A successful attack!


A British Line infantry unit normally rolls one dice per block, but as they are firing uphill this reduces that number by one. British Line infantry roll an extra dice if they have not moved, but this unit has, so we arrive at three battle dice rolled. The British player has rolled an artillery symbol, an infantry symbol and a flag symbol. The symbol rolled indicates the opposing unit’s losses, so the artillery symbol is not counted, but the infantry symbol is. The French unit loses one block. The flag symbol indicates that the French unit must retreat one hex towards its own lines. More flags would mean more retreats. So, the French unit falls back to the only open hex off the hill away from the British unit and with a reduction of one block. A successful attack!

On another part of the line, a British Line unit forms up to
attack a French Line unit, again on a hill.
As the British are attacking up the hill, their battle dice are reduced by one, so the British player rolls three dice, one per block, minus one for the hill.

This time, the British player scores an infantry symbol, an artillery symbol and a sabre symbol. As before, the artillery symbol is ignored, but the French unit loses one block for the infantry symbol and another block for the sabre symbol. The sabre symbol doesn’t count in ranged combat, but it causes a casualty in melee. Although the French unit has lost two blocks, it stands its ground, there were no flags rolled. Because of this the French unit may battle back. The French Line units melee with an extra dice against enemy infantry, so the French player may roll three dice here.
Cavalry are probably the biggest threat to infantry in the
open, but there is a defensive stance that the infantry can take that
alleviates the problem somewhat. This is the previously mentioned square. The
Infantry square was an anti-cavalry tactic used throughout the Napoleonic wars
and anyone who’s ever watched the film Waterloo will remember the British
squares against the French cavalry attacks.


Forming a square occurs in an opponent’s turn when cavalry
is about to melee against an infantry unit. The defending player announces that
they intend to form square and readies their square track. The attacking player
chooses at random one of the defending player’s command cards and it is placed
on the square track in one of the numbered positions.


The square token of the same number is then placed by the unit in square to remind players that unit has formed. This has the effect of reducing the player’s hand of command cards and therefore their tactical flexibility whilst they have units in square. However, it also reduces the number of cavalry attack dice to just one when they are attacking an infantry unit in square.


The square token of the same number is then placed by the unit in square to remind players that unit has formed. This has the effect of reducing the player’s hand of command cards and therefore their tactical flexibility whilst they have units in square. However, it also reduces the number of cavalry attack dice to just one when they are attacking an infantry unit in square.

A final word about leaders now. Each scenario gives the
player a certain amount of leaders and these can be attached to units to help
them fight or to bolster morale. In some circumstances, a leader that is
attached to a unit can add an extra dice to the combat roll for that unit,
making them much harder hitting. Leaders will also ignore one flag rolled
against a unit that it they are attached to, making them stand firm!


This has been a brief overview of some of the core rules of
the game of Command and Colors Napoleonics and there are far more bits and
pieces within the game itself can this post can cover. The game also has
a variety of expansions that cover most of the major powers and theatres of the
Napoleonic Wars, all are interchangeable and multiple box sets can be used
together in epic struggles of mighty armies. Some of these rules are detailed in the accompanying video, so please have a look here (and please subscribe!):
All links in this post to Amazon are affiliate links and earn me a small commission.

Thanks for the review! Seems like a good system, although bespoke dice can be annoying.
ReplyDeleteAt £101 (according to the amazon link) it is also fairly pricey.
When you play some games, please let us know how they go!
Thanks, I am glad you enjoyed it. The dice make for a quicker game, tbf, but you could easily make a new
Deleteto hit' roll if you so wish with normal dice. It may be cheaper on Ebay or through GMT themselves.
We played the first two scenarios on Sunday it was excellent, quick to play and with a good result (although I lost...)
Very thorough and well presented review. I have played quite a bit of C&C and always enjoyed the fun aspect of play. Thanks.
ReplyDeleteThanks Norm, I am glad you enjoyed it, even though you've played it. Yes, it's a great fun game that's easy to set up and get on the table for a quick afternoon's gaming.
DeleteThis comment has been removed by the author.
ReplyDelete