Roland CII WIP Pt.5
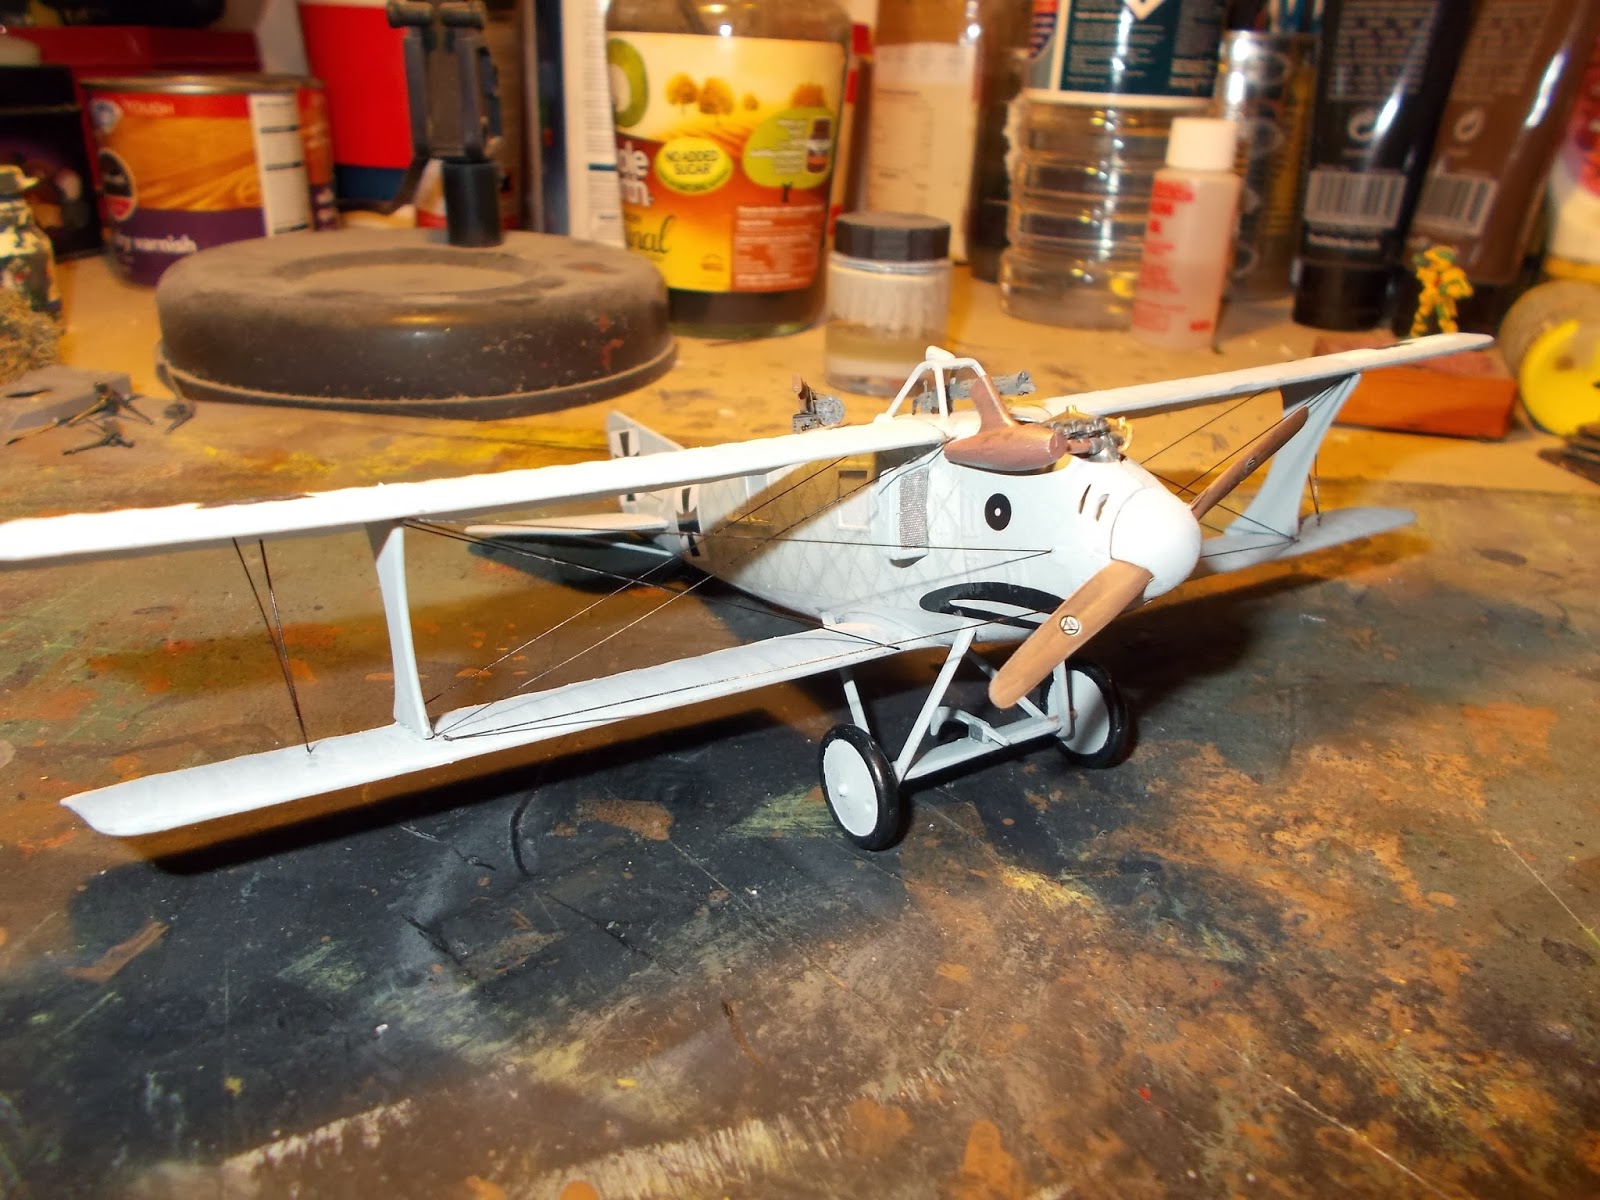
Finally the Roland was built and painted, but this was only the first step of finishing off. It still needed weathering and varnishing. Here it is before the final stages:
I had a minor disaster with the varnishing. I used some gloss spray varnish and the original coat of Mr Hobby paint started to blister below the later layers of Humbrol. It looked like six months of work was going down the drain in seconds.
However, I left the plane to dry overnight and by morning the worst of the damage seemed to have passed, I'm not sure how but the paint seemed to settle back down. I did repaint the upper surfaces of the top and tail wings though, just to get rid of the slightly blistered effect left behind. I decided that I had had one close shave enough and left the underside of the aircraft unvarnished and just went onto the weathering instead...
However, I left the plane to dry overnight and by morning the worst of the damage seemed to have passed, I'm not sure how but the paint seemed to settle back down. I did repaint the upper surfaces of the top and tail wings though, just to get rid of the slightly blistered effect left behind. I decided that I had had one close shave enough and left the underside of the aircraft unvarnished and just went onto the weathering instead...
I gave the entire model a wash in very thinned down black acrylic paint which was also wiped off with some cotton buds where it had gathered too thickly. I dragged the paint to the rear of the wings where dirt would naturally gather. I was happy with the result and it looked, to my eye at least, as thought it had been flying in rain.
I didn't want to tempt fate any further, so I left it at that and turned my attention to the base. I already had a wooden base from Wooden Bases from when I built the Pfalz, which had been earmarked for this build. I added a square of grassed paper to the base then added Woodland Scenic static grass with the help of some PVA glue. I also added a few grass tufts to break up the shape some more and it was ready.
Back to the plane, I removed the masks on the fuselage windows and added the windscreen to the front of the cockpit. Underneath, I realised that I had lost the tail skid somewhere along the build, so I carved a new one out of plasticard, added it and painted it. It's not very detailed but it won't be seen and holds the tail up in a realistic manner.
So that's it for now, I just have the two crew members to paint and to mount the whole thing on its base and this seemingly never ending project is finished!


Comments
Post a Comment