Pavlov's House, a Christmas Rapid Fire AAR
This Sunday was the last chance before Christmas for a game, I did think of setting up a Through the Mud and Blood scenario based on an attack by the Coldstream Guards on the Gerrman lines on 25th December 1914, just to show not everyone was involved in the Christmas truce (or the fictional football match, despite Sainsbury's and UEFA trying their best to turn myth into reality...).
However, I decided on a seasonal game from World War Two, based in Stalingrad and using some of the figures that I have already painted for this long-term project. Ninjasaurus Rex called off at the last minute, but Dean was up for a game (anything for human contact, TBH). So I set up mini-Stalingrad, loosely based on the defence of Pavlov's House, but in a fictional suburb of the factory zone.

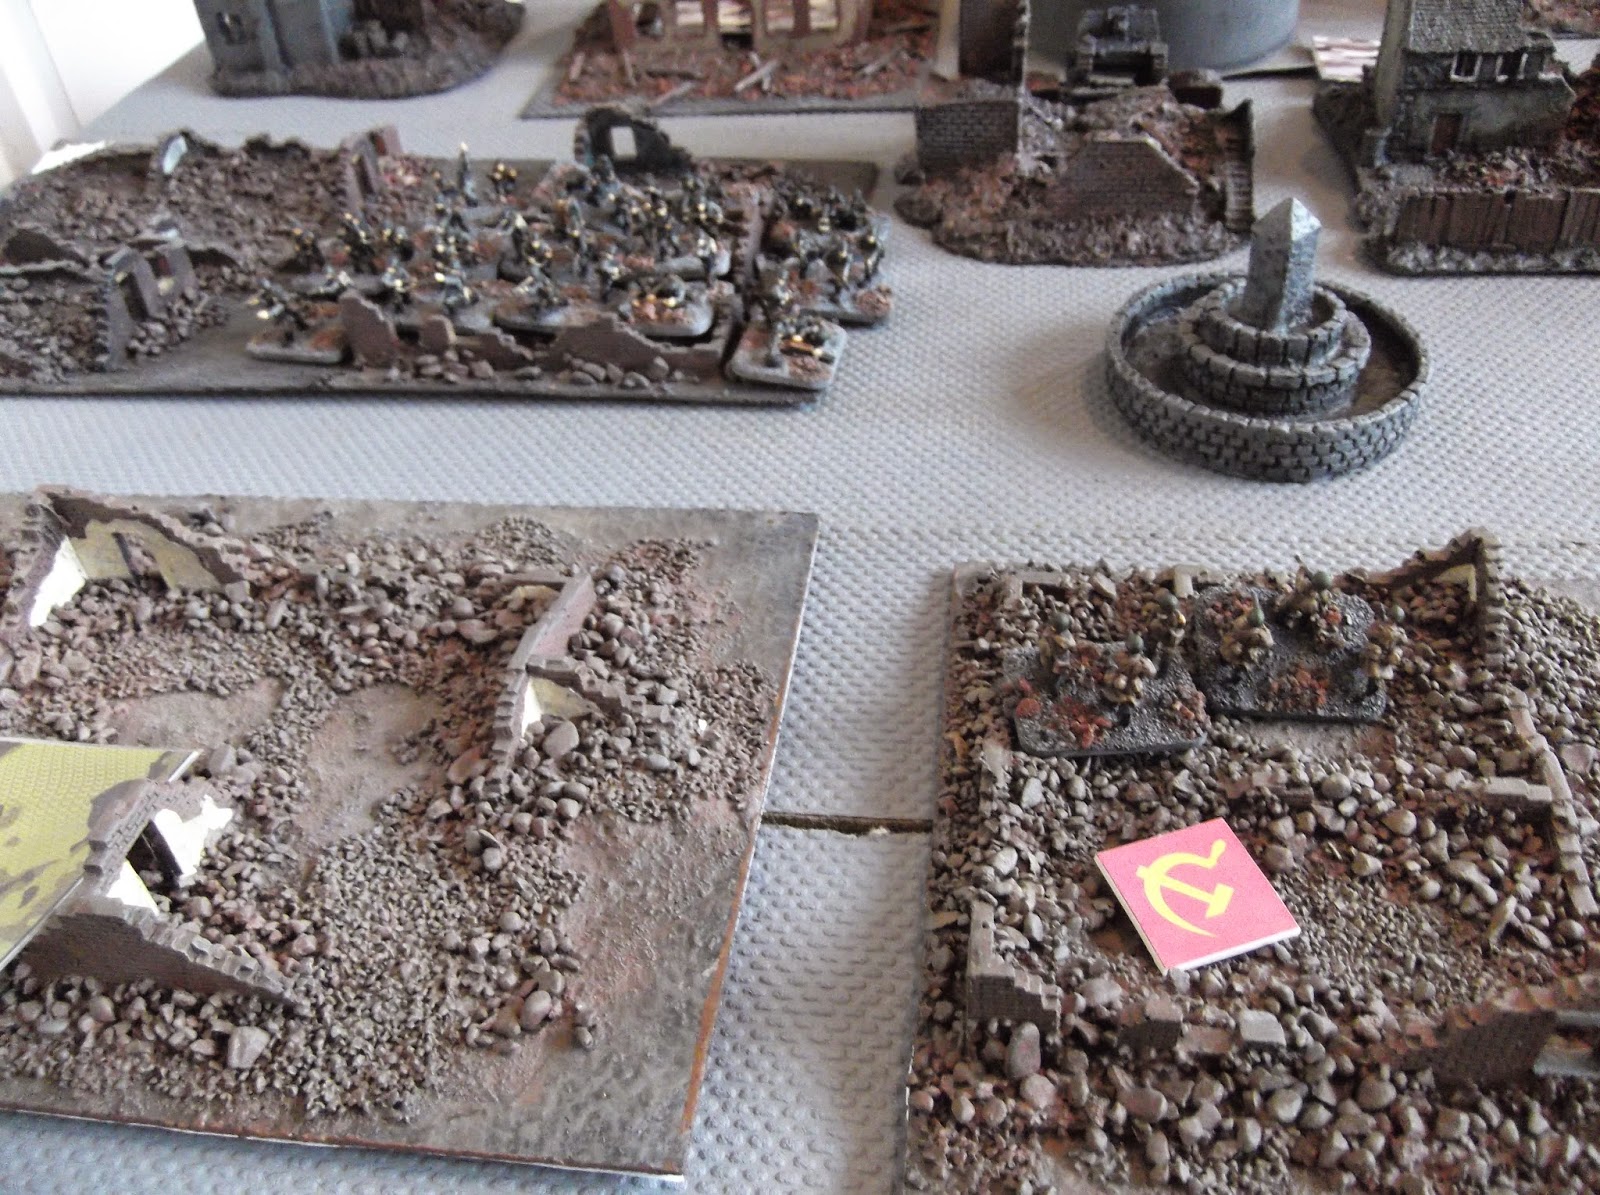
The game was to take place over a 4' by 4' table, to make sure we got into contact quickly and make the game a little shorter. We also used hidden movement, with cards replacing the units until they were spotted. This seemed to fit perfectly with the built up fighting in the city and was the first time we had really done this in a Rapid Fire! game. The picture above shows the table at set up, with a lot of buildings clustered around a smashed up park/woodland. The green cards denoting Soviet defenders, whilst the grey cards were the German attacking units. Half of the cards were dummy markers, so it was hard to know where the opposition was actually hiding! There were six objectives (the red Hammer and Sickle markers) and Dean's attacking Germans had to hold four or more by the end of the eighth game turn to win, my Soviet defenders had to prevent this from happening.
The attacking German forces consisted of:
Regimental HQ: CO + 5 figs + Truck
1 x 75mm Infantry Gun
2 x Battalions, each with:
HQ= CO + 5 figs
3 x 9 Figure Companies + 2 x MG34 MMG + 1 x 81mm Mortar
1 x Engineer Platoon= 9 figs (1 x flamethrower)
2 x Panzer III
1 x StuiG 33B Assault Gun
Whilst the defenders had a depleted force of:
1 x Divisional HQ: CO + 5 figs
1 x SMG Battalion = 6 figs
4 x Rifle Battalions = each with 7 riflemen + 1 x AT Rifle + 1 x MMG or 1 x 5cm Mortar
1 x 82mm Mortar
1 x Factory Militia Battalion: HQ = CO + 3 figs + 2 x Factory Militia Company = 4 figs each + 1 x Factory Militia MMG
1 x T-70 light tank
2 x 45mm AT guns
1 x Sniper team
With the hidden movement it was difficult to assess where the attack would come from, so I set up a lot of my depleted battalions on the objectives, with the militia in reserve and the two AT guns on each of the flanks. Idiotically, I placed the sniper team in one of the rear buildings avoiding the obvious position of the large central building. I didn't want him to draw fire but in the event it turned out to be the best place for them as they could have shot down the German attackers in the park! Hindsight is always 20/20 vision...

It didn't take long before first contact was made and Dean revealed his first battalion on my left flank, he did this in order to gain surprise and spot one of the 45mm AT guns, up front and all alone! A battalion's worth of gun fire soon knocked it out.

As the Germans advanced more of their units were revealed, including the StuiG 33b, a fearsome piece of armoured artillery.

Despite revealing some big units, there was little firing until during my first turn, a lone Panzer III was spotted by my T-70, which managed to get off a shot and cause the Panzer heavy damage!

As the German battalion struggled through the rubble, I revealed the SMG battalion waiting on the objective.
A fire fight broke out across the fountain square and although I took a lot of casualties, the SMGs certainly gave good enough back. Even the StuiG's fire was largely desultory, so I managed to hang on by the skin of my teeth.

On the other side of the parkland, I had revealed the defenders of one of the factory buildings, a depleted battalion of seven riflemen, an MMG and AT rifle. These poured fire on the German engineers, causing more casualties and faltering the attack a little.

The first German Battalion advanced across the rubble strewn streets to get into a better position to finish off the SMG unit and also spotted another of my battalions holding the left flank.

Suddenly the second German battalion appeared in the fountain square, advancing against the objective which had now been cleared of defenders. The T-70 and Panzer III exchanged more shots, which caused light damage against the Soviet tank. More Soviet defenders were revealed in the central objective and they started to pour fire on the attacking Germans.Things were really heating up!

The quiet right flank suddenly erupted in action as another Panzer III appeared to threaten the factory defenders. It successfully passed the test to allow it to approach infantry in cover and it came all guns blazing.

So, the situation on turn three was two German battalions pressing on my left flank, whilst the right flank was under threat from German armour. Yet, I still hadn't revealed all my forces, so I still had something up my sleeves.

One of those somethings was a concealed 45mm AT gun, which made short work of the Panzer III as it tried to retreat into cover. A perfect shot fired straight across the war memorial square.

Meanwhile, the German attack was slowly getting bogged down in the rubble, the soldiers were not making much headway and the engineers had retreated to safety behind a ruined factory building.

Every step forward for the Germans was covered by gun fire, not only from the riflemen, but the T-70 as well.

My left flank was all but destroyed, so I drew out the reserves in the shape of the factory militia, they broke cover and made a move for the objective near the fountain, which had now passed into German control.

However, a hail of bullets, mortars and fire from the StuiG soon reduced their numbers.

The entire unit was decimated in seconds, all that was left was a single crewman from the MMG, who broke and fled the field. A very ignominious start for the militia!

Despite these small success stories, the Germans were still having trouble getting their men through the rubble and the attack was inching forward at a grinding pace.

The tables turned quickly though, when the German fire-power was concentrated on the factory defenders, who withered in the hail of bullets. Only the AT Rifle crew survived the storm.

Not only that, but the T-70 had taken another hit form the 75mm Infantry Gun and was now on heavy damage, so I tightened the right flank defence by drawing in a second battalion to hold the factory objective.

More disaster as the T-70 was struck again by the 75mm, which brewed it up.

With the coast clear, the German HQ truck sped down the road towards the factory, dodging AT rifle fire.

The first German battalion had managed to get themselves closer to the central objectives, a lot of rifle fire was exchanged, but they kept coming on.

The HQ debussed from their truck and captured the right hand flank objective. Dean now had two objectives under German control, but still needed two more to win.

But it wasn't to be, that was the last move of the game, move eight and his infantry units were not in a position to attack the objectives and win more objectives.

The Russian defenders had taken a massive battering, with only about twenty men remaining from the original force of over fifty. Had the game gone another turn, I think the Germans would have broken into the central objective buildings and cleared them, but I had managed to hang on by the skin of my teeth. It just shows that Russian defence can be tenacious! The German attack was hampered by moving through the rubble of the buildings, which really slowed things to a painful crawl. However, had he gone through the open streets, a lot more casualties would have been caused, so it was a tough decision to make. I made a massive mistake by not putting my sniper in the central objective building, but I thought that would be too obvious and he ended up being buried in the buildings at the back and having no impact on the game at all. Ah well, lesson learned.
The forces we used represented about two third of the actual forces involved in the Stalingrad scenario from the Rapid Fire! team, so when we finally get to play that scenario it will be a big one!
Thanks for looking, and finally, if you're interested in the rubble on the bases of the figures, I am selling bags of it on eBay in three different colours, please take a look HERE.
Thanks for looking, and finally, if you're interested in the rubble on the bases of the figures, I am selling bags of it on eBay in three different colours, please take a look HERE.

Also, this is probably my last blog post until the new year, so I hope you have a happy Christmas and a good new year!

So beautiful and so realistic...excellent! Happy Christmas!
ReplyDeleteThanks Phil, we try! The boards are only about 75% finished actually, but they are slowly getting there. Happy Christmas to you too!
DeleteFantastic report, a really gritty, intense sounding game! Looks great too. Merry Christmas :-)
ReplyDeleteThanks Paul, it really was intense! Merry Christmas to you as well!
DeleteGreat report, always liked to game urban battles.
ReplyDeleteCheers,
Pete.
Thanks Pete, urban games can be a challenge from both attacking a defending positions, this certainly was!
DeleteGreat looking table!
ReplyDeleteThanks Gaz! I'm glad you liked it!
DeleteFantastic game! Very inspiring.
ReplyDeleteMerry Christmas
Thanks Thanos!! I'm glad you liked it, it was a great game to play as well! Merry Christmas to you too!
Delete