Roland CII WIP
Last Christmas, I gave you my heart, the very next day you gave me a 1/48th scale Roland CII by Eduard.
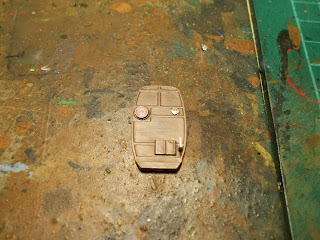
It's taken me nine months to make a start on this kit, but I have grabbed a few moments here and there recently to get it moving along. Like my Eduard Pfalz DIII it's a lovely kit, it comes with plenty of pre-painted photo-etched metal parts which make it an interesting build. Here is the engine pre-weathered:
The two dials on this control panel are from the photo-etched parts, showing how detailed they are (even though they will never be seen...). This just needs a couple of extra bits adding to finish it off:
Also, the cockpit interior is a long way off finishing, but I've made a start. The kit provides masks for the clear plastic parts to make painting easier, you can see them on the windows. Plus it will protect them when I varnish the interior, as clear plastic always mists up when the varnish dries.
Here is the cockpit with the rear observer's cockpit in place (but not fully painted...):
The dashboard is a great example of the photo-etched parts in this kit. This is not fully complete and has a few dials and handles to add. I am leaving them off for the moment as I don't want to damage them until the dashboard is ready to be put into the cockpit.
As I have now submitted my MA dissertation I am able to crack on with this build, so check back for updates soon. Speaking of which, I shall also be celebrating finishing a two year course on the First World War by reading something about the Second World War:
I was advised to buy this book as I am putting together some figures for a Singapore/Malaya campaign in Rapid Fire. I'm looking forward to starting it! Thanks for reading!


Very nice start!
ReplyDeleteThanks Jay, now I have more time this little beauty should roll along nicely!
DeleteAnother 1/48th scale aircraft....I'm insanely jealous. My hands start shaking every time I even look at my unbuilt kits! Well done with the MA dissertation - let us know how that goes because it sounded really interesting.
ReplyDeleteThanks Sidney, yes, I like the size of the 1/48th scale, big enough for detail, small enough to display in a small area. Grab a kit and get on with it! I bet with your painting skills the end result would be amazing! I will let you know how the marking goes. I'm just glad to have the bloody thing out of my mind for a bit...
Delete