The Battle of the Slim River 5th - 7th January 1942 AAR
On Saturday we played another scenario in our ongoing Malaya campaign; the Battle of the Slim River (crikey, it's been over a year since we played the last scenario!).
This action was fought between the 5th and 7th of January 1942. The initial Japanese probes on the morning of the 5th came to nothing and the British forces began to fall back to the south. However, during the withdrawal the Japanese forces fell on the defending 4/19th Hyperabad and 5/2nd Punjabs. The Japanese attackers included tanks and engineers and managed to get through the Indian line to cause mayhem amongst the British artillery of the 137th Field Battery, 5/14th Punjab Regiment and 2/1st Gurkha Rifles, destroying or scattering all these formations. Finally they achieved the capture of the bridge over the Slim River and the British defeat here lead to the loss of central Malaya to the Japanese invaders.

This action was fought between the 5th and 7th of January 1942. The initial Japanese probes on the morning of the 5th came to nothing and the British forces began to fall back to the south. However, during the withdrawal the Japanese forces fell on the defending 4/19th Hyperabad and 5/2nd Punjabs. The Japanese attackers included tanks and engineers and managed to get through the Indian line to cause mayhem amongst the British artillery of the 137th Field Battery, 5/14th Punjab Regiment and 2/1st Gurkha Rifles, destroying or scattering all these formations. Finally they achieved the capture of the bridge over the Slim River and the British defeat here lead to the loss of central Malaya to the Japanese invaders.

Image from: http://www.far-eastern-heroes.org.uk
The re-fight was based on the actions of the 5th and 6th January when the Japanese launched their attack and it was fought through dense jungle cut by the main road south. The Indians had blocked this main road with concrete pillars (represented by barbed wire) and these could only be shifted by the engineers (taking D6 turns). The Japanese had to reach the south of the battlefield (edge closest to the camera) before 20 turns had elapsed to win the game. The Indians had to stop this from happening. The attacking Japanese were controlled by Dean and Ninjasaurus Rex and I took the beleaguered Indian defence force.

The Japanese forces consisted of two battalions of infantry, made up of four companies of twelve men (each with a knee mortar) and a HQ along with a platoon of four Engineers and a 70mm field gun. On the tenth turn five Japanese light tanks would also join the attack. The Indian defenders consisted of two battalions of infantry, each of four companies of eight men and a six strong HQ with a mortar and Boys AT rifle. Support would come from the 155th Field Artillery Battery with 1/2 D6 barrages of 4.5" howitzers off table to the south. This artillery would only be available on the tenth turn. The Indian forces were also positioned as hidden units behind prepared defences with five of the fifteen being dummies in an attempt to confuse the attack.

Movement through the dense jungle was severely limited to 3" a turn and observation was reduced to only 3", so this would be a close fought action and I placed the 5/2nd Punjab battalion on the right and the 4/19th Hyperabad battalion to the left of the main road in a thin line across the table.

Both Japanese flanks began moving against my Indians, but I held fast, knowing that the prepared defences were my strongest points. The hidden units around the roadblock were dummies, it was a delaying tactic that worked for a short time and drew the Japanese towards the centre of the field.

As the Japanese moved into observation range on my right flank the Punjabis (represented by British soldiers) began firing at them.The rifle fire was accurate and caused some heavy damage.

Despite causing heavy casualties on the attackers, the sheer numbers of Japanese rifles made short work of the defenders.

It was just a matter of time before the first company of Indians was destroyed and the probing Japanese attacks began moving onto the road. Meanwhile the Japanese right flank bided its time.

Slowly but surely the attackers were manhandling the 70mm field gun through the jungle! The infantry were now past the roadblock and were swarming towards my next point of defence.

The attackers were now on the open road and little was standing before them.

I had no choice but to release the units on my right flank. They made slow progress towards the point of crisis. Unfortunately this meant they were away from their defences and would lose any bonuses that they had.

Meanwhile, on the road the HQ of the Hyperabad Indian battalion was keeping the Japanese busy by mortaring them with the 2" mortar and causing casualties with rifle fire.The attack seemed to be faltering.

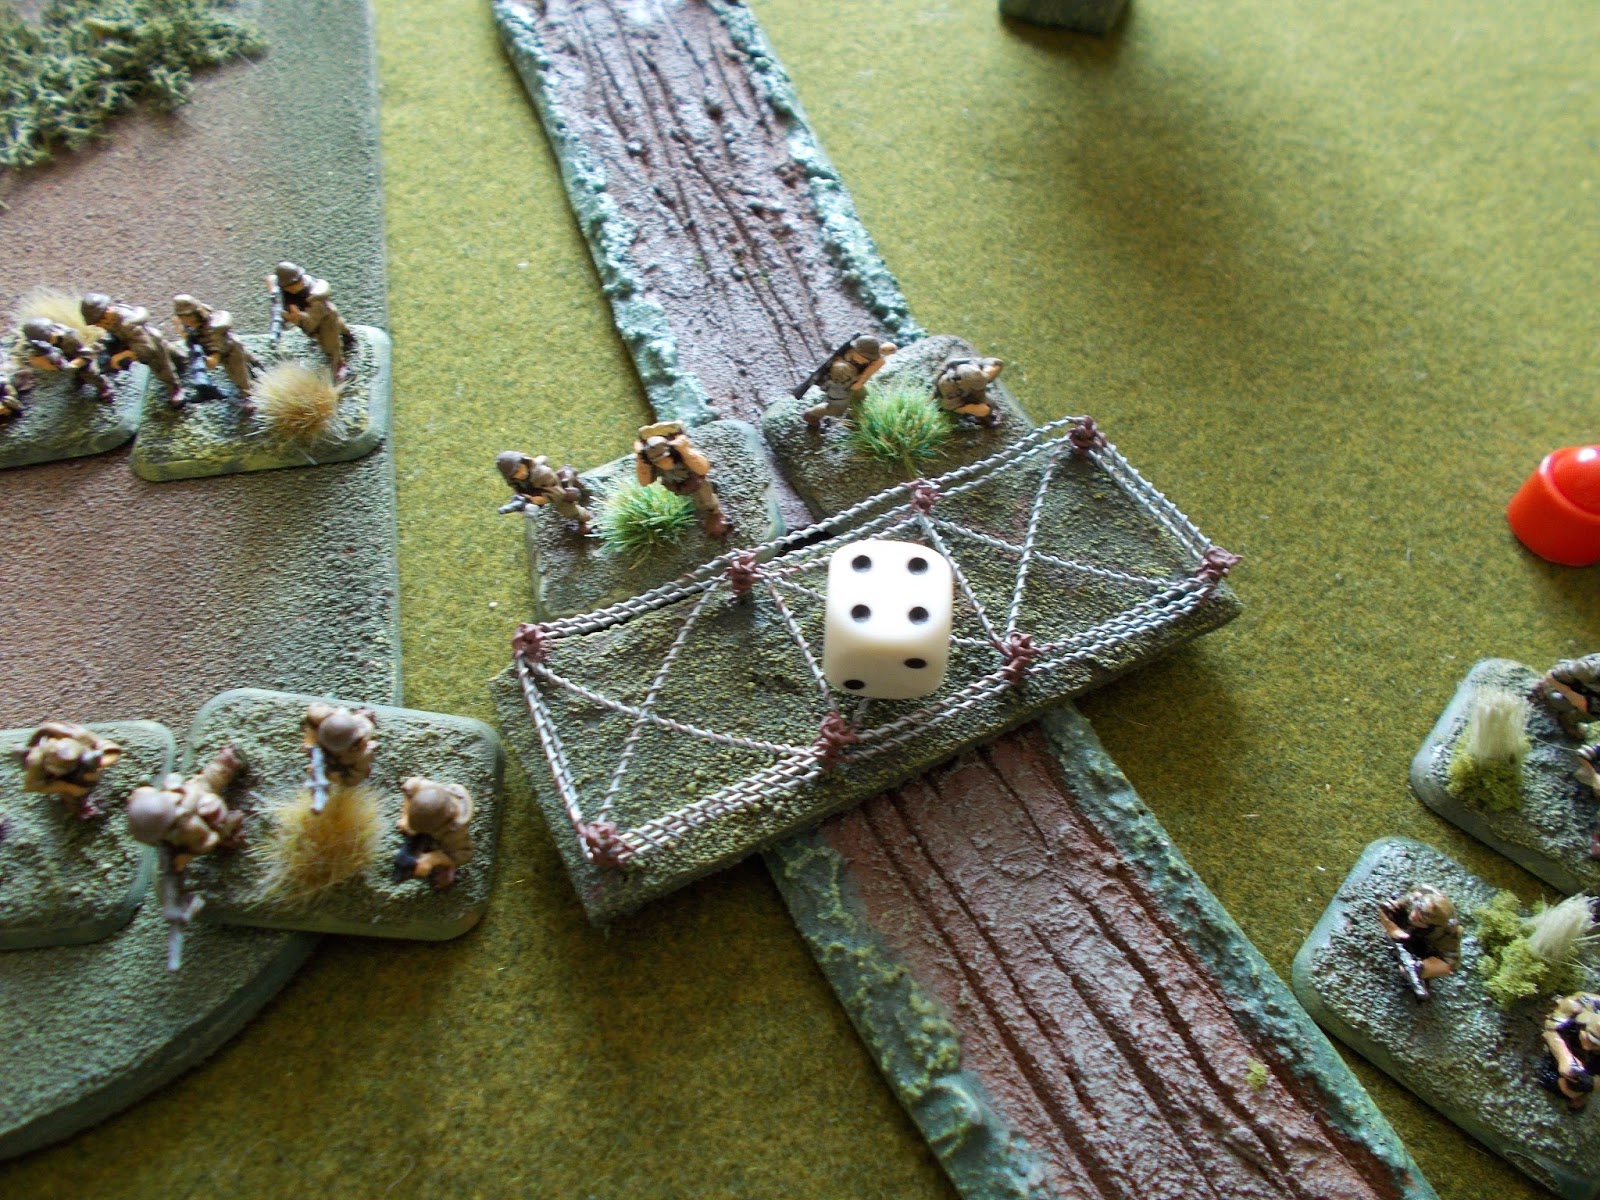
Further north, the Japanese engineers had reached the roadblock and began working on dismantling it. It would take them four turns to clear the blockage, by which time the tanks would have arrived!
At about the mid point the centre of the field looked like this. The Japanese right flank was waiting to strike whilst the left flank was still continuing probing attacks. My remaining Punjabis were closing on the attackers to hit them in the flank.

I rushed the Punjabis into action and they caused some initial casualties.

Inevitably it didn't last long as the Japanese cut them down with rifles, mortars and artillery.

With the losses the Punjabis were suffering their morale collapsed and they retreated off the table. My right flank had broken.

Then on turn ten the Japanese tanks appeared on the northern road. It was now desperate from my point of view. I had scant anti-tank weapons, so I would be at the mercy of the armour!

I desperately threw some of the remaining Hyperabads into action to try and plug the gap in my line. Also I rolled a 2 for the amount of artillery support I had and both rounds fired but missed their targets.

As with most desperate solutions my tactics didn't work and another Indian unit fell.

I was being forced into the south-west corner of the battlefield, the tanks were through the roadblock and threatening my remaining infantry.


Rifle fire was exchanged with more Japanese infantry whilst the Hyperabadis soaked up the punishment from the tanks.

The Japanese on the left flank were making good headway down the road and it was almost over.

Meanwhile, my northern defence position was overrun by a combination of infantry and tanks.

I had one unit remaining, but they stood their ground despite facing overwhelming odds.

However, five tank machine guns were brought to bear on them and the result was inevitable.

The Japanese infantry swarmed forward down the road and ended the game in a Japanese victory.

The final positions looked like this:

The game ended on the 16th turn, which meant that if I had been able to hold on for another four turns, victory would have been mine, but, as for the real life defenders, it was not to be. The Japanese forces would go on to maul the British rear positions and capture central Malaya and Kuala Lumpur.

This campaign has a rather repetitive nature, especially playing as the British. Inevitably they will be forced off the table at some point, however, I think this particular action saw some good defence by the Indians who caused a lot of casualties on the attackers, but not enough to stop the flow. The jungle helped as well, slowing the attack down and denying the Japanese the use of their mortars and artillery. In hindsight I should have scattered my defences down the length of the road to try to hold the Japanese at every point, but I thought a line defence would have worked!
The next major action in the Malaya campaign was fought near Gemas and involved the Australians, perhaps the luck of the British will change there?

Cool game, thanks for posting. I am shifting gears from Europe to the Pacific and this is quite inspiring. I'm doing Phillipines '44 and Okinawa first, before going further west to do 14th Army. I hadn't thought of Malaysia as another campaign to play.
ReplyDeleteThanks Nathaniel, I am glad you liked the post! The Malayan campaign is a largely forgotten theatre. Each of our games have resulted in British losses, as was true in history. But it all about trying to stop the tide of Japanese for as long as possible! If you click on the 'Malaya' tag at the bottom of the post you'll find the rest of the campaign.
DeleteNice report, love this terrain, very atmospheric...
ReplyDeleteThanks Phil, I always assume I don't have enough trees to cover the board for jungle, but I think it looks OK. anyway, it lets us move the figures about easier...
Delete