Berlin Strasse WIP Pt. 3
Welcome back to part three of this ongoing build, you can find part one HERE and part two HERE. Ninjasaurus Rex has published an incredibly comprehensive blog post on how he made the building he gave me as a present, you can find this HERE.
I noticed that he and I have done things differently in our approaches to these buildings, but, after a discussion with him about how he made the rubble in the bottom of his building, I followed his example.
To make things easier in the future, I wanted to dye the sand and rubble before putting it on the model as I had found that painting the stuff in situ was difficult. So, I grabbed some tempera paint; Black and Burnt Umber, and mixed them together in a container:
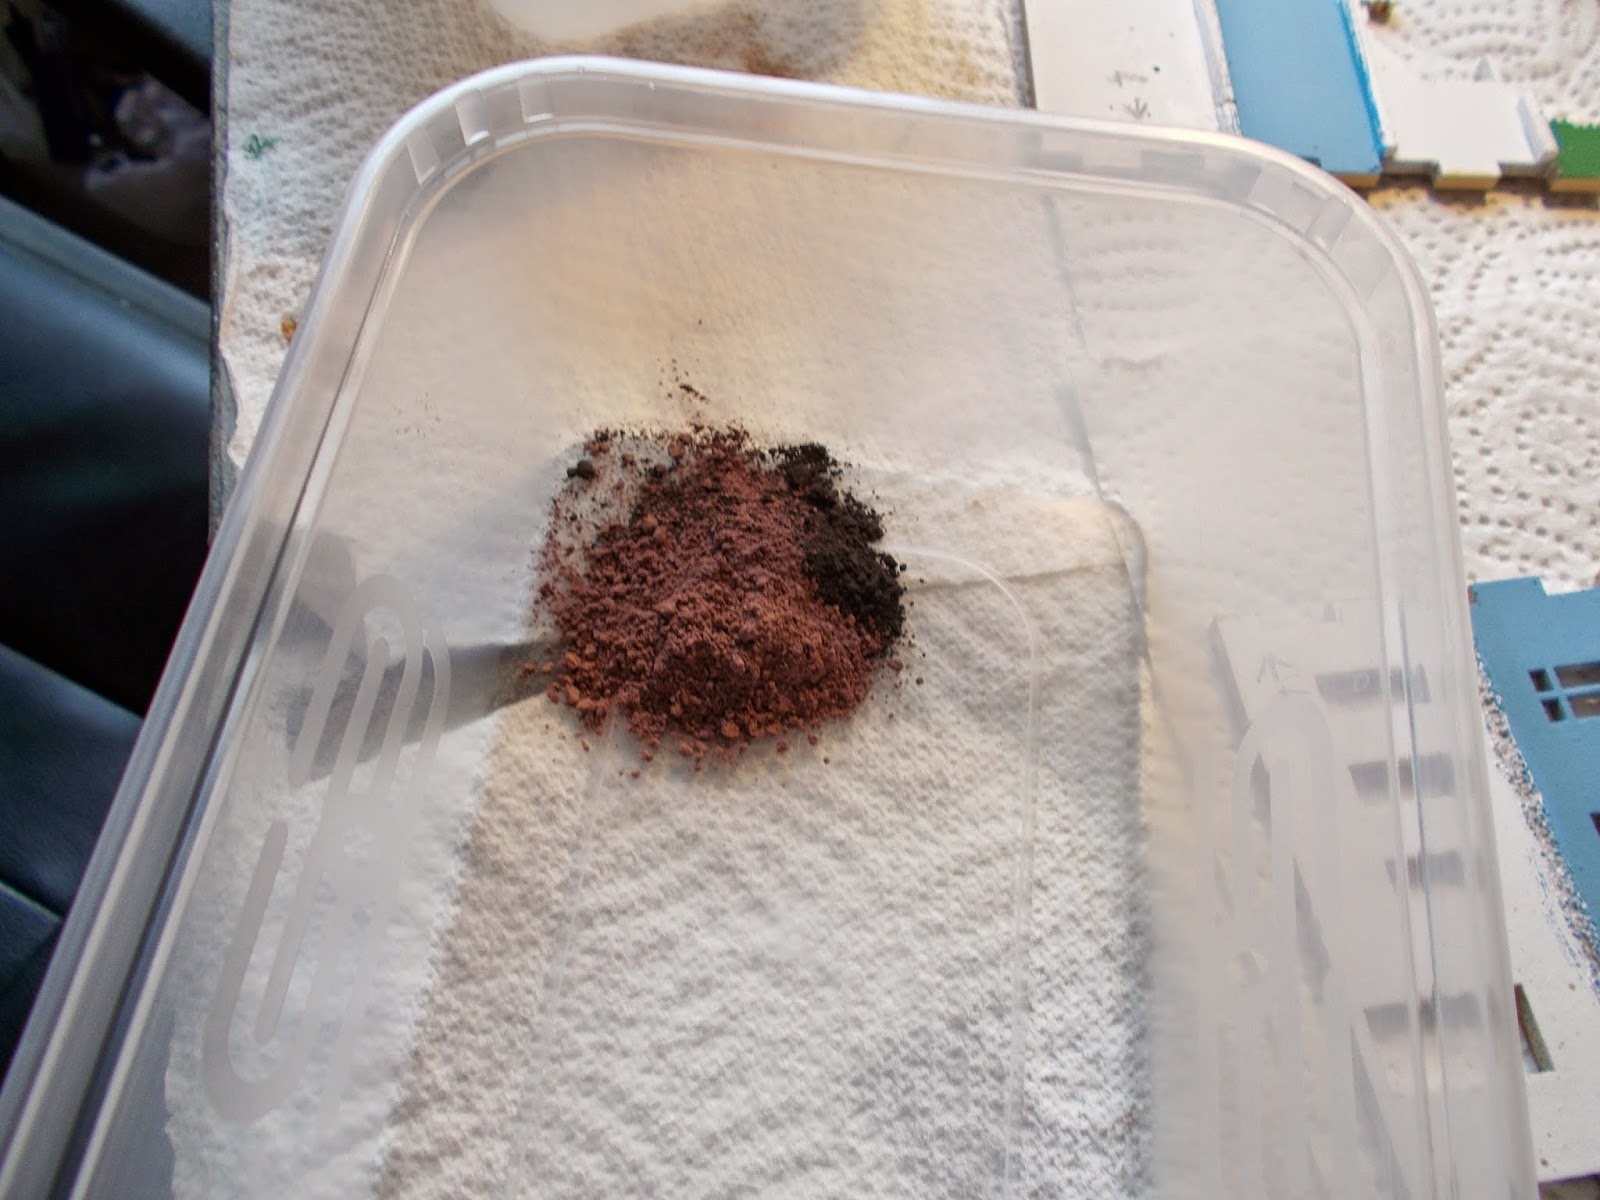
To this mixture I added some fine sand, gave that a good mix and ended up with this:

Then I chucked in a load of water. I didn't measure how much water and ended up with a bit too much, but the colour was about right:

To soak up the water and make my mixture go a long way, I added more courser sand, along with some small pebbles and railway modeller's ballast. This lot quickly soaked up the dye and had an uneven texture which I was also after:

Whilst that concoction dried, I turned my attention back to the painting. I block coloured some of the interior walls with different pastel shades, and block painted the rubble on the floor. I wanted something different for some of the walls though and Ninjasaurus had been researching 1940s wallpaper for his ruined building and kindly provided me with .jpegs of the images he used. I printed them out on a few sheets of paper:

The next task was to cut out strips to fit into the gaps I had left for the wallpapered areas. I stuck them down with PVA glue and left them to dry overnight.
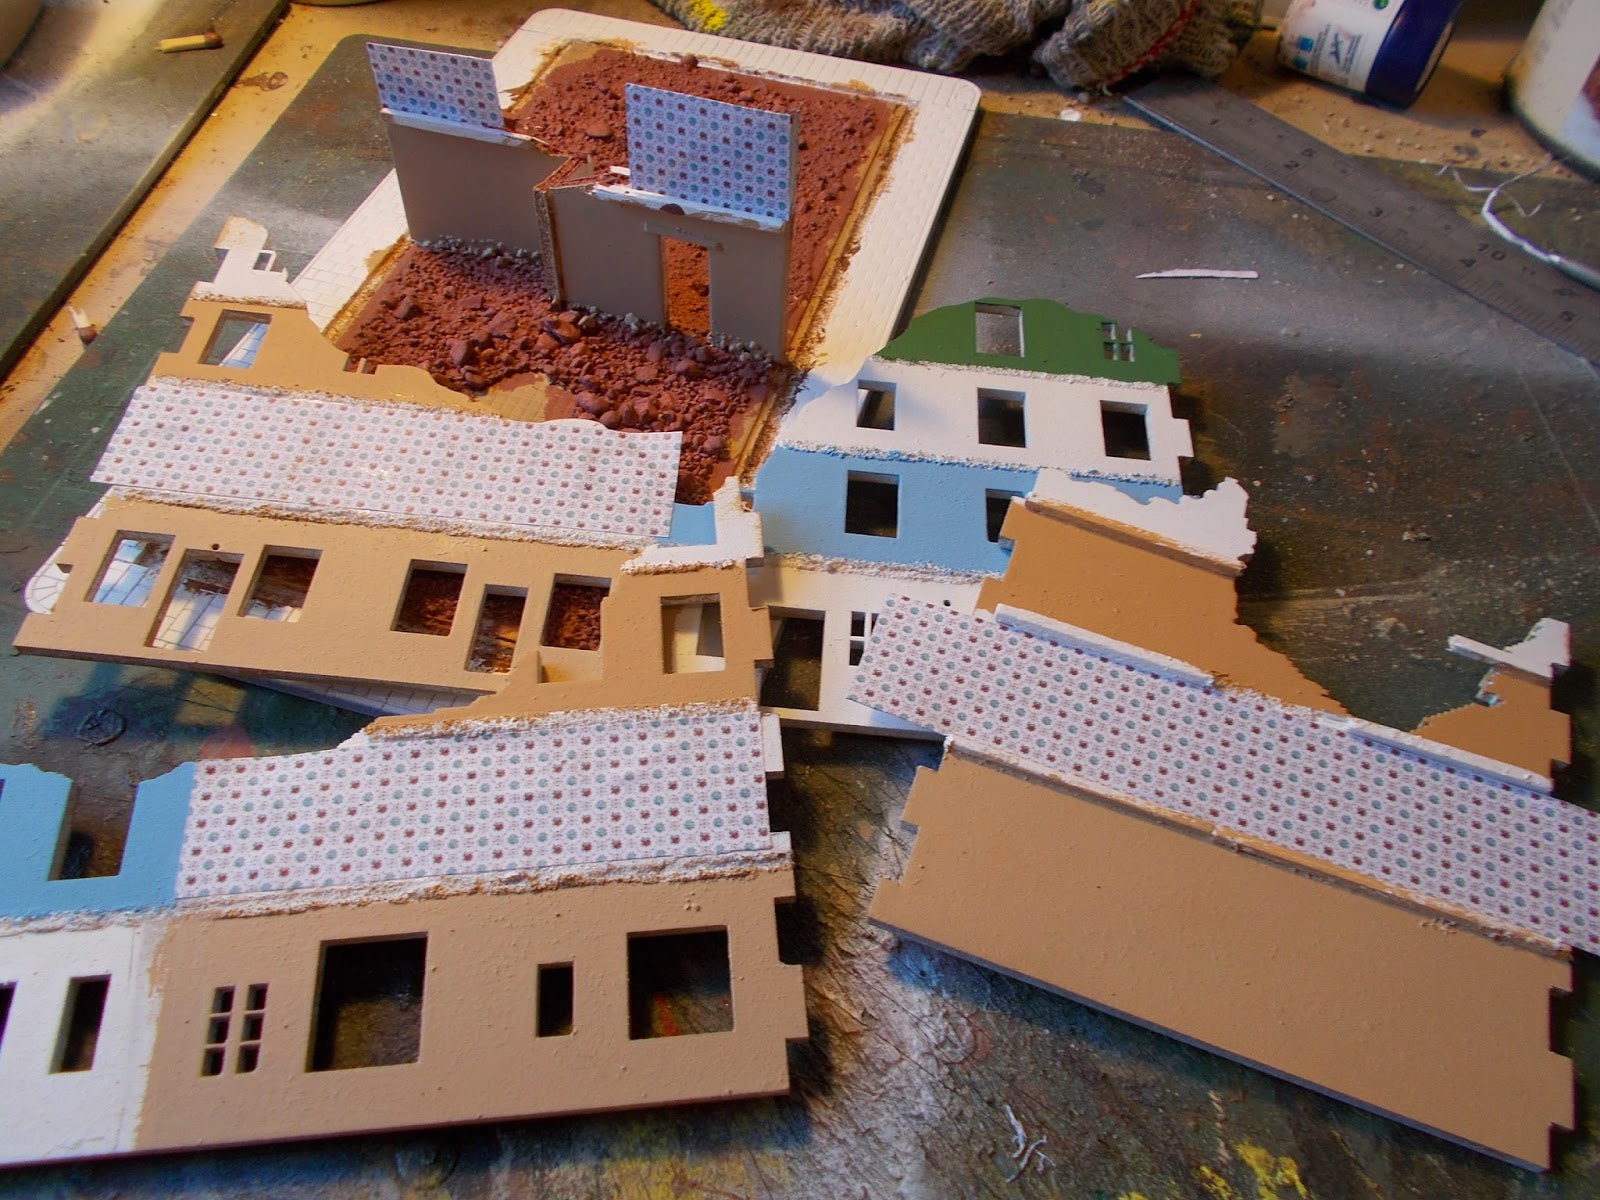
When they were good and dry I cut the squares out around the windows, in some cases this wasn't very neat and I tore the paper whilst doing it. However, as this is meant to represent a smashed up building, I figured that the wallpaper would have taken a pounding as well and would be torn and shredded as well.

I did the same thing with the third floor walls and this was the result:

I took a couple of hours to paint in the brick work that was showing and block in other details, there is still more to do, but it currently looks like this:

It won't be long before I can weather this bad boy, it has taken a while as I have not spent as long at it as I would have liked recently what with being busy at weekends, but keep looking back for more updates!

Looking good. I weathered the interior before assembling mine but that's because my building was taller. It looks like yours will be easier to work with when assembled.
ReplyDeleteI'm glad you ripped the paper! It's one of two things I regret not doing to the one I made.
Ta, I haven't fixed the walls in position yet, so the interior walls will be weathered before the final gluing. Then I'll do the outside ones as well.
Deletebeen following both blogs, definitely inspired me, any chance of sharing the wallpaper .jpeg?
ReplyDeleteThanks you, I'm glad it's done some good for someone! The wallpaper jpeg wasn't created by me, but Ninjasaurus. If he allows, I will post it up here.
DeleteAlex, that's looking really terrific. The wallpaper effect is excellent, and a lot easier than painting on a floral pattern!
ReplyDeleteThanks Sidney, the wallpaper was all Ninjasaurus' idea and execution really. But, yeah, it's way easy than painting the stuff!
Delete